From modern to traditional, we see windows with various arch styles that complete the architecture of a home. But how can a homeowner add window coverings to the spaces while maintaining the aesthetic the arches created? It’s a concern and challenge for Dealers and Interior Designers. The solution is an arch-shaped panel. And don’t worry about the check measure, we’ve got a few tricks to make it easy.
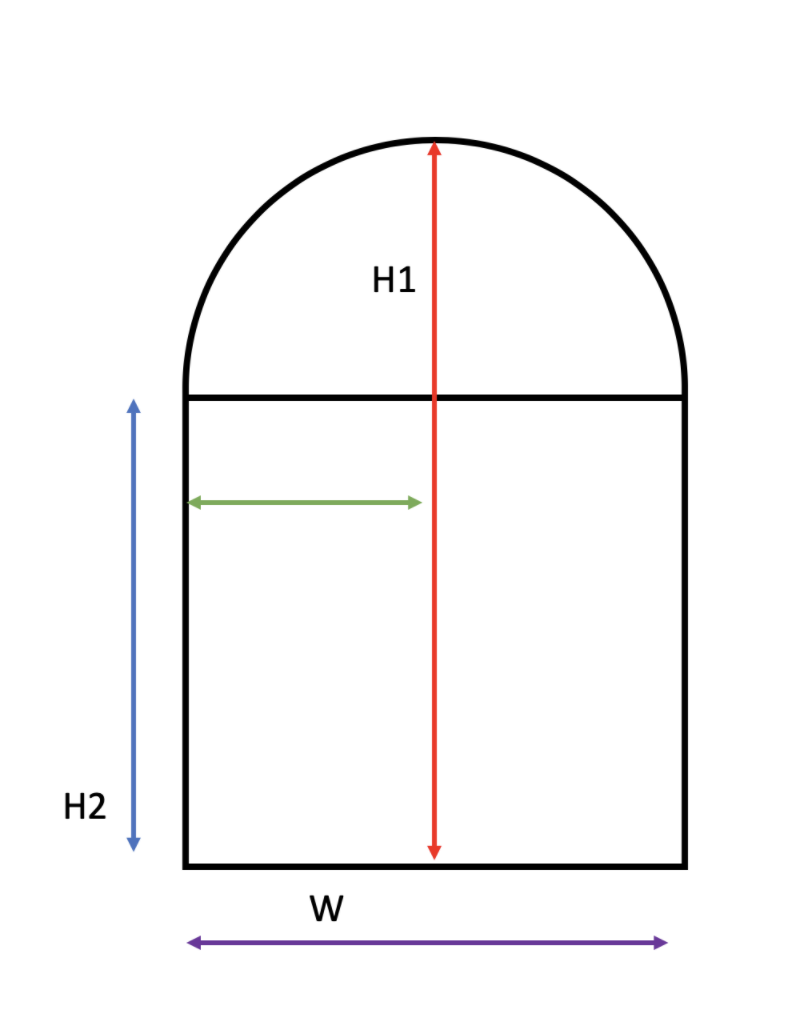
For a “perfect” arch, we need three measurements.
- Width (Purple Line)
- H1: Height at the centerline- tallest point of the opening, should be exactly halfway between the legs. (Red Line)
- H2: Height of both legs (Blue Line)
The height at the centerline should be equal to half of the width at the centerline.

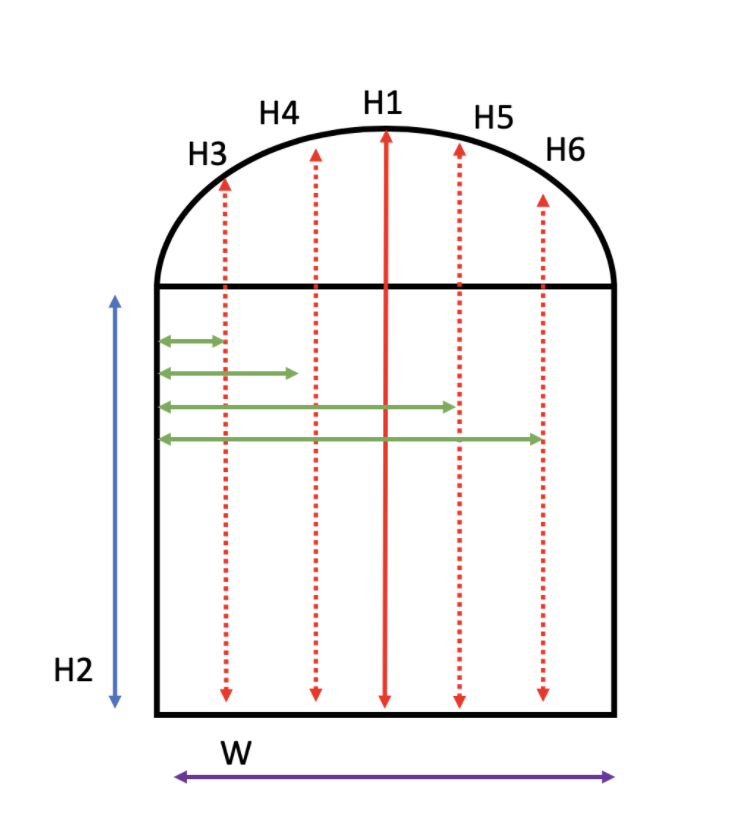
For an elongated arch, we’ll take a few more measurements.
- Width (Purple Line)
- H1: Height at the centerline- tallest point of the opening, should be exactly halfway between the legs. (Solid Red Line)
- H2: Height of both legs (Blue Line)
- H3-6: Midpoint Heights (Dotted Red lines) and the Distance from the left leg to the Midpoint (Green Lines)
Take two additional equal distance measurements between the legs and centerline
Always include the measurement from the left leg to the midpoint height

The additional H measurements will be used to plot the curve of the arch for production. Whenever possible, we recommend you include photos of the arches and a drawing with the measurements plotted.
Now that you are an expert in measuring arches, you can take on that home with a dozen sweeping arches on the main floor!
Call your sales rep for additional support while taking complex measurements.


